# Pulse SEO - complete documentation
Every page of https://pulseseoapp.com/docs, concatenated in reading order.
Generated from source, so it always matches the live site.
For a shorter index with one-line page descriptions, see https://pulseseoapp.com/llms.txt
Pages in this file, in order:
1. What DispatchSEO is (Getting started)
2. How it works (Getting started)
3. The setup wizard, step by step (Setup)
4. Install Claude Code (Setup)
5. Use Codex instead (Setup)
6. Use Cursor (Setup)
7. Google Search Console (Setup)
8. Keyword data sources (Setup)
9. Publishing and GitHub (Setup)
10. The Content API (Setup)
11. Connect your site (Setup)
12. Day to day (Using it)
13. The dashboard, page by page (Using it)
14. Automations and modes (Using it)
15. Agent commands (Using it)
16. Concepts and glossary (Reference)
17. MCP tools (Reference)
18. Environment variables (Reference)
19. Schedules (Reference)
20. Architecture (Reference)
21. Troubleshooting (Help)
22. Common questions (Help)
23. Security and your data (Help)
---
# What DispatchSEO is
> An SEO manager driven by the AI you already pay for, the Claude app or a coding agent - research, content that ships to your site, and rank tracking, on infrastructure you own.
Source: https://pulseseoapp.com/docs/introduction
DispatchSEO turns the AI you already pay for into the person who handles your
SEO: the ordinary Claude app at claude.ai, or a coding agent (Claude Code,
Codex, Cursor).
Your AI researches keywords and writes the guide. The finished article is
posted straight to your WordPress site, or opened as a pull request against
your repo. DispatchSEO is the backend it works against: the queue of ideas
waiting for your yes or no, the rankings, the Search Console numbers, the
schedules that make it happen without you asking, and the dashboard where you
approve things.
You spend a few minutes a week. It does the rest.
## The part that makes it different
Every other AI SEO tool has the same problem: it doesn't know your product. So
it crawls your homepage, infers what you probably do, and writes from that
guess. You can feel it in the output.
Your agent doesn't have that problem. It has your codebase open. It knows what
you built, who it's for, and which claims are actually true.
So DispatchSEO doesn't try to be a writer. It gives that agent the half it's
missing - real search data, a place to keep state between sessions, schedules
that fire while you sleep, and a human approval gate - and gets out of the way.
The backend is deliberately boring. It stores things, it runs jobs on a timer,
and it asks you before publishing. Every judgement call - which keyword is
worth chasing, what angle to take, whether a draft is any good - happens in
your agent, where your product knowledge already lives.
## The loop
Once a week it mines your Search Console data, Google Autocomplete, and
what it already knows about your product. Each idea lands in a queue with
the reasoning attached: the keyword, why it looks winnable, the angle.
Each idea is a card on the dashboard. Approve, reject, or drag it up the
queue. Or turn on automatic mode and skip this step entirely.
Every morning, one approved idea becomes a real PR against your repo -
checked against the live search results first, and run through a sameness
reviewer so your twelfth guide doesn't read like your third.
Daily rank checks, hourly Search Console snapshots, index verification.
When a scheduled job breaks, you get a red banner and an email rather
than silence.
## Who this is for
You'll get value out of this if:
- **You have somewhere we can publish.** Either a WordPress site you host
yourself, where finished articles are posted straight to it, or your site's
source in a Git repo, where they arrive as pull requests you review.
- **You already have an AI.** The ordinary Claude app at claude.ai on a paid
plan, or a coding agent: Claude Code (on the plan you have),
[Codex](/docs/install-codex) (metered on an OpenAI key), or
[Cursor](/docs/install-cursor) (on your Cursor plan). Your AI is the engine,
and DispatchSEO never bills you for its usage.
- **You'd rather own the thing than rent it.** One Docker command, your
machine, your data, AGPL-3.0.
## Who this is not for
Being honest saves you an install:
- **Wix, Squarespace, Shopify, Webflow, Framer, or Ghost.** There's no repo to open a
pull request against and no way in through their own APIs either. This will
not work, and there's no workaround planned. (WordPress you host yourself
does work - see above.)
- **Anyone whose only AI is ChatGPT or Gemini.** ChatGPT can't connect to us
yet, and the Gemini app has no way to connect an outside tool at all. The
Claude app, Claude Code, Codex and Cursor all work today.
- **Anyone wanting content published without review.** You can turn that on -
but the whole design assumes a human who occasionally says no.
- **Anyone expecting results in two weeks.** SEO doesn't work that way, and the
product tells you so on the dashboard rather than pretending otherwise.
## What it costs
Nothing, unless you want paid data. The tiers stack:
| Tier | Price | What you get |
| --- | --- | --- |
| Search Console only | **$0** | Rankings from GSC, keyword ideas from Autocomplete and your own impression data |
| + SerpApi free key | **$0** | Live search-result checks, real positions weekly (250 free lookups a month) |
| + DataForSEO | pay per call | Search volume, keyword difficulty, domain rating |
Free mode finds keywords you can win. Paid mode also knows which ones are
worth winning. See [Keyword data sources](/docs/keyword-data) for the detail.
## Where to go next
Pick an install path and get it running.
The moving parts, in plain English.
Two ways to run it. What actually differs.
Every page here is available as plain markdown - add `.md` to any docs URL.
The whole documentation set in one file lives at
[/llms-full.txt](https://pulseseoapp.com/llms-full.txt), and there's an index
at [/llms.txt](https://pulseseoapp.com/llms.txt).
---
# How it works
> The moving parts - your agent, the backend, your repo - and which one is responsible for what.
Source: https://pulseseoapp.com/docs/how-it-works
There are three pieces. Knowing which does what makes everything else in these
docs easier to follow.
| Piece | Runs where | Responsible for |
| --- | --- | --- |
| **Your AI** | Your machine, GitHub Actions, or claude.ai | Thinking. Research, judgement, writing. |
| **DispatchSEO** | Your Docker install, or pulseseoapp.com | Remembering. State, schedules, the approval gate. |
| **Your site's repo** | GitHub | Publishing. Content lands here as pull requests. |
The split matters: DispatchSEO never writes a word of content and never
decides what's worth writing. It holds the queue, the numbers, and the timer.
## Why the agent does the thinking
Traditional SEO tools start from a disadvantage. They know your domain name
and whatever they can scrape off it. Everything they suggest is downstream of
a guess about what your product does.
Your agent has your repo open. It has read your code, your README, your
existing posts. When it evaluates whether "self-hosted analytics" is a keyword
you can credibly rank for, it isn't guessing - it knows whether you actually
built that.
That's the whole architectural bet. The expensive, hard-to-fake part
(understanding the product) is already solved on your side, so the backend
only has to supply the part your agent genuinely lacks: memory between
sessions, search data, and a schedule.
## How your agent talks to the backend
Over [MCP](https://modelcontextprotocol.io) - the Model Context Protocol.
DispatchSEO exposes an MCP server at `/api/mcp`. Your agent connects to it
once, and from then on it can read and write the same state the dashboard
shows: the queue, tracked keywords, published pages, rankings, Search Console
stats, backlink prospects.
```bash
claude mcp add dispatchseo --transport http https://your-install/api/mcp \
--header "Authorization: Bearer YOUR_PROJECT_KEY"
```
The bearer token does double duty: it authenticates the request *and* selects
which site you're working on. One DispatchSEO install can manage any number of
sites, and the token is what tells them apart.
There are no "generate an article" or "look up this keyword's volume" tools on
the server. Your agent does research with its own tools - including
DataForSEO's own MCP server, which the pipeline wires up for you - and uses
DispatchSEO to remember the results. That boundary is deliberate and enforced
in the codebase.
Anything the dashboard can do, your agent can do over MCP, and the reverse.
Approving an idea, reordering the queue, merging a PR, changing settings - all
available from chat. See the [MCP tools reference](/docs/mcp-tools) for the
full list.
## How work happens without you
Three kinds of scheduled job keep things moving:
Weekly, your agent derives keyword candidates from your product and your
Search Console data, checks them, and files the good ones as pending
suggestions.
Daily, it takes the oldest approved idea and builds it into a pull request
- at most one guide per day, permanently.
Rank checks run daily, Search Console snapshots every few hours, and index
verification sweeps confirm Google actually picked the page up.
Where those jobs run depends on how you installed:
- **Self-hosted with Docker**: a cron container fires the backend jobs, and a
builder container runs your headless coding agent for the content work. Nothing on
the internet needs to reach your machine.
- **Everything else**: GitHub Actions workflows in your own repo, on their own
schedules.
Either way the schedules are the same. [Schedules and jobs](/docs/schedules)
has the full table.
## How content reaches your site
Never by pushing to your main branch. Always as a labeled pull request.
An approved idea becomes a branch, a commit, and a PR with the target keyword,
the angle, and the search-results reasoning in the description. In
semi-automatic mode you press Merge. In automatic mode, a PR whose checks pass
merges itself.
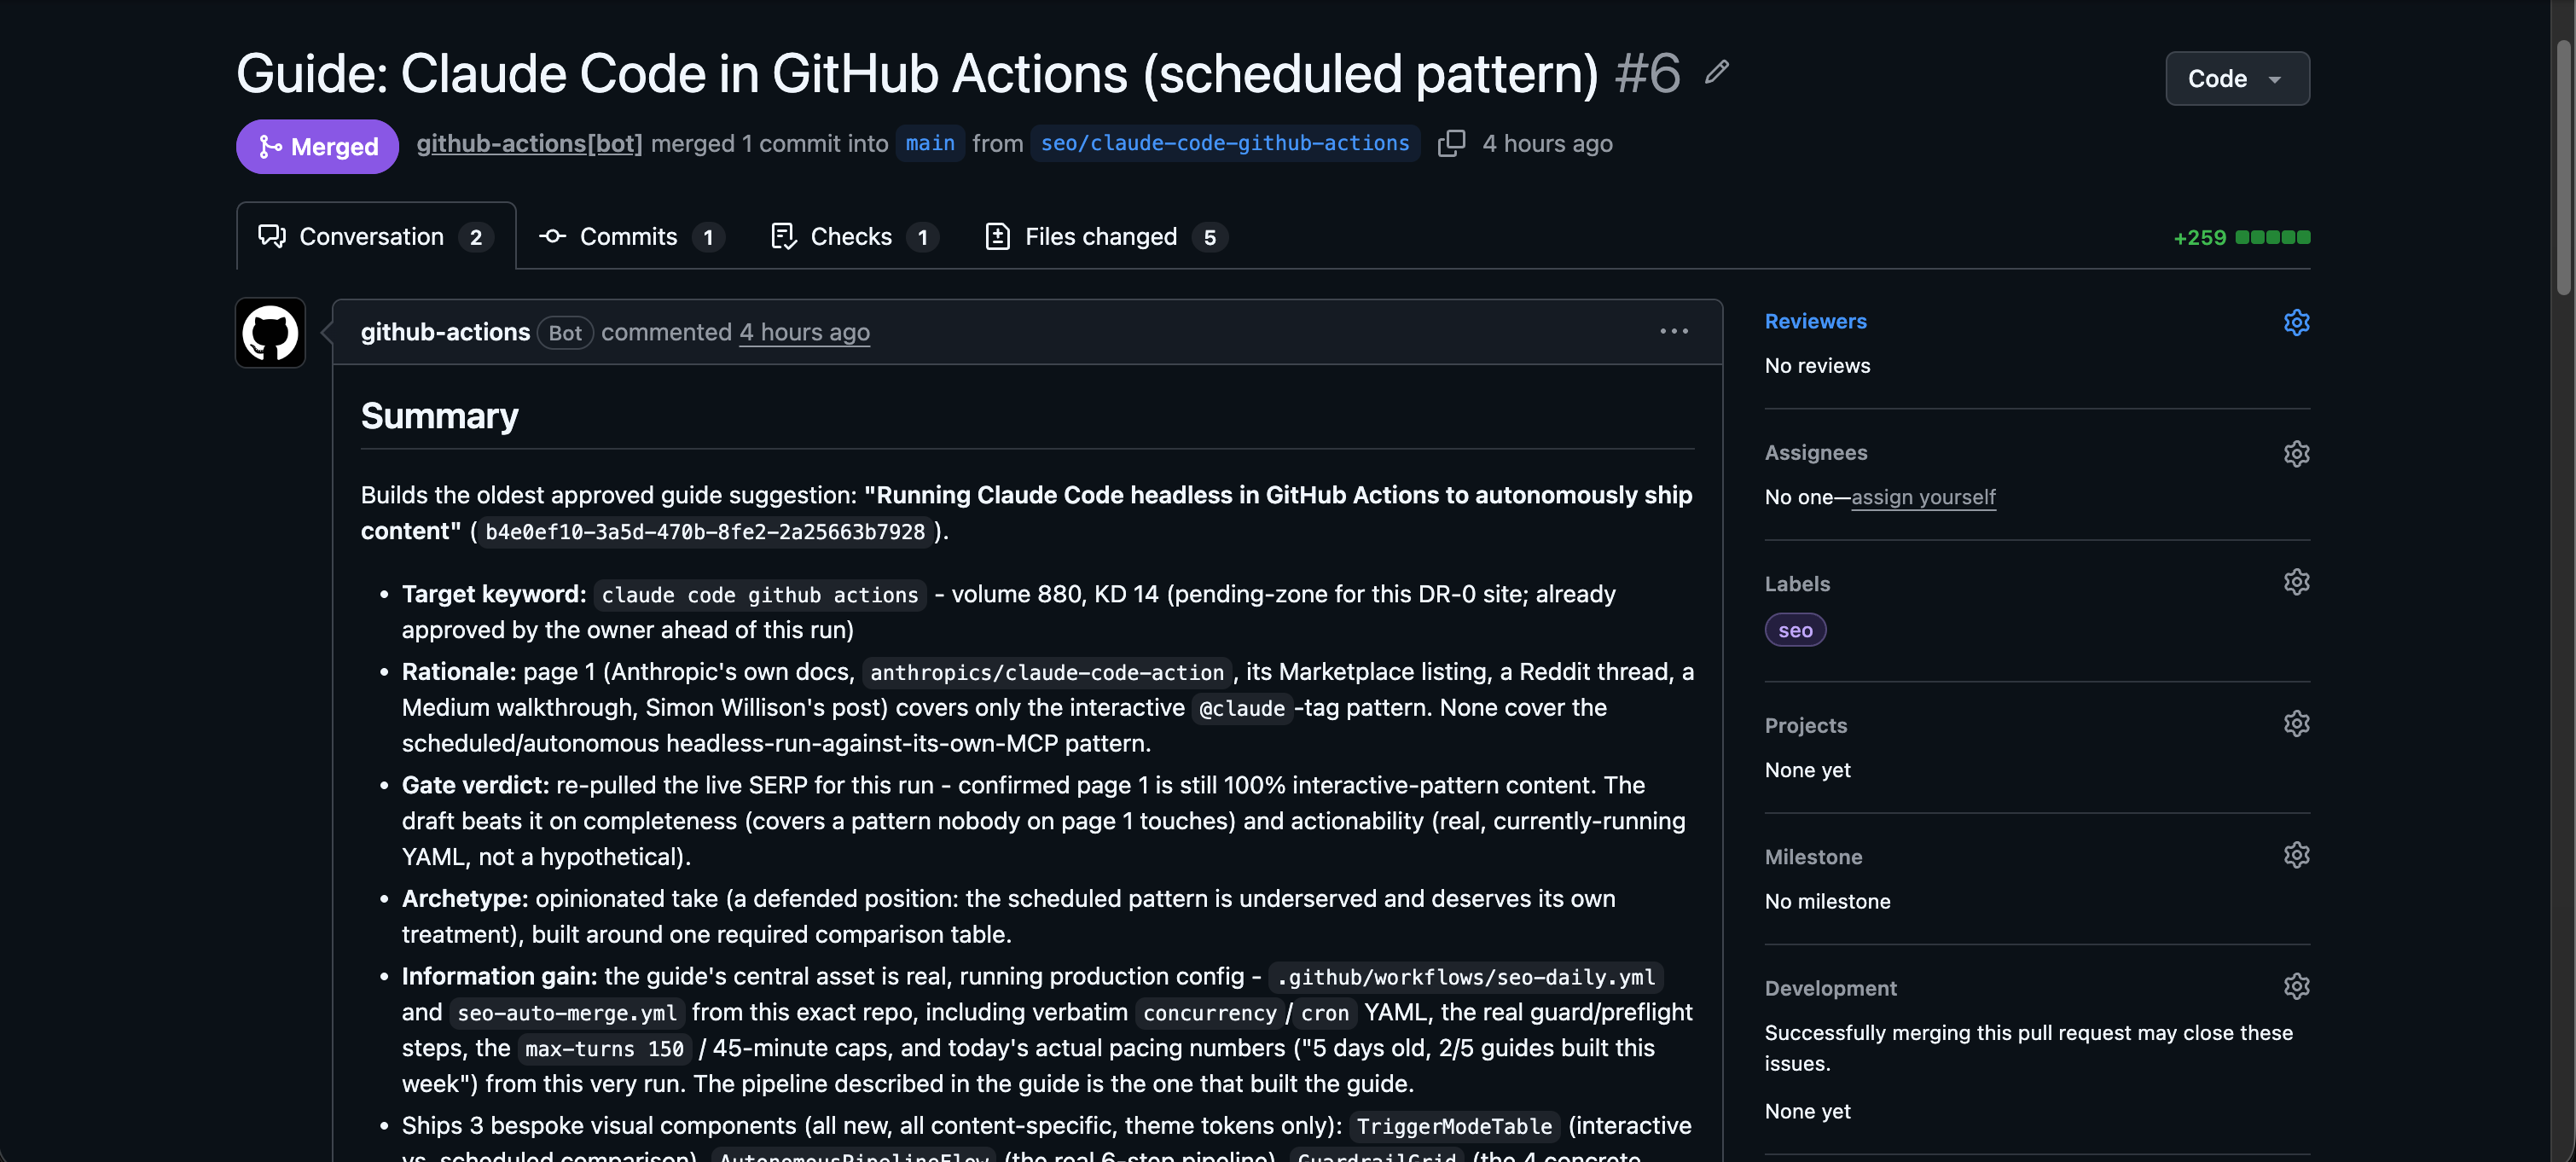
After it merges, DispatchSEO logs the page, asks Google to index it, and
starts tracking its keyword. [Publishing and GitHub](/docs/publishing) covers
the mechanics.
## What stops it publishing junk
Volume alone is easy to game, so several gates sit in front of the builder:
- **A quality bar** - a search-volume floor, plus a difficulty ceiling that
scales with how strong your domain actually is, so a new site isn't sent
after keywords it cannot win.
- **A live search-results check** before writing, so the guide is built against
what's actually ranking today.
- **A sameness gate** that compares the draft to your own published corpus and
rejects it if it reads like a re-skin of something you already have.
- **A pace limit** of one guide per day, permanently.
- **You**, by default.
[Automations and modes](/docs/automations) explains each one and what you can
turn off.
## Next
Decide which way to run it.
Every term this product uses, defined.
For self-hosters and contributors.
---
# The setup wizard, step by step
> What each wizard screen asks for, why, and what to do when a step gets stuck.
Source: https://pulseseoapp.com/docs/setup-wizard
The wizard starts the first time you open your dashboard. It checks each
step on the spot and saves your progress as you go: close the tab
whenever, and it reopens exactly where you stopped.
## On pulseseoapp.com (the hosted version)
The hosted wizard is shorter - about 5 minutes - because the platform does
the installing for you. It also branches: the first screen asks where your
articles should go and which AI will write them, and your two answers
decide which screens you see after that.
1. **Add your site** - name and domain, then the two questions. Where do
finished articles go: a WordPress site you host yourself, a GitHub
repo, or neither yet? And which AI will write them: the ordinary Claude
app at claude.ai, Claude Code, Codex, or Cursor? There is no repo field
here; the repo comes from the GitHub App on the next screen if you pick
that answer.
2. **Connect WordPress**, or **Connect GitHub** - which screen you get
depends on the first answer. For **WordPress**: your site's address,
the username you log in with, and an application password. The screen
shows you where to
generate one (in your own WordPress admin: Users, then Profile, then
Application Passwords) and checks it against your site before it lets
you past. Nothing gets installed on the site itself. For a **GitHub
repo**: one click installs the Pulse SEO GitHub App on it, and the
platform then commits the pipeline into the repo and manages PRs
through the App - no tokens to create or paste. If you answered
"neither yet", this screen doesn't appear at all.
3. **Connect the Claude app**, or **Connect your coding agent** - three
shapes, and you get the one your answers point at. If your AI is the
**Claude app**, the screen gives you one address to paste into
claude.ai under Settings, then Connectors, as a custom connector, plus
the sentence to send in a new chat so your
Claude introduces itself to the site. A light on the screen turns green
on its own the moment your Claude reaches us; there is no button to
press. Expect claude.ai to ask you to allow each Pulse SEO tool the
first time it uses it - choose Always allow - and expect Claude to ask
you three short questions about your business; a sentence each is
plenty. From then on the Home screen's "Your next step" list tells you
which sentence to paste next and which screen to open. If it's a **coding agent and your articles go to a repo**, you
paste the credential the agent asks for (`claude setup-token` for
Claude Code, an OpenAI API key for Codex, a Cursor API key from
cursor.com/dashboard/api for Cursor). It's stored as a secret on **your
repo**, never on our side, and builds run on your own subscription or
key. A **coding agent with no repo** gets one connect command to run in
a terminal, and stores nothing anywhere. Don't have an agent yet?
Install [Claude Code](/docs/install-claude-code),
[Codex](/docs/install-codex), or [Cursor](/docs/install-cursor) first -
about five minutes, and this step won't pass until you have.
4. **Connect Google Search Console** - one click, sign in with the Google
account that has access to your property, pick the property. Read-only,
revocable any time. No service account needed. You can skip it and come
back later; everything else works without it, you just have no traffic
numbers until it's connected.
5. **Publish mode** - decide whether pages go live only after you approve
them (semi-automatic) or fully on their own.
Then the finale does the rest itself and shows live progress until your
site's first data lands - on the repo path, that includes installing the
pipeline. Keyword data is included in your plan - there is nothing to set
up for it.
If your articles go to a repo, there is one thing the App can't do for
you. It deliberately holds no permission to change your repo's own
settings, and some repos have GitHub's "Allow GitHub Actions to create and
approve pull requests" turned off - which stops Pulse SEO opening the
pull requests it publishes through. When that's the case, the finale says
so with a direct link to the setting. Flip it once; the checklist
re-checks on its own and unblocks, so there's nothing to come back and
confirm.
The rest of this page describes the **self-hosted** wizard, which has a
few more steps because your own install does the work the platform does
on the hosted version.
## Step 1 - Add your site
Name, domain, and GitHub repo of **your website** - the site you want
Google traffic for, not the machine Pulse SEO runs on. The repo is the
`owner/repo` part of its GitHub URL. Then one question: does your site have
a blog? "Not sure" is a valid answer - Claude checks the repo and decides
during setup.
## Step 2 - Connect Google Search Console
This is where your ranking and traffic numbers come from. Pulse SEO
reads them through a **service account** - a robot Google account that it
signs in as. You create one once and it works for every site you ever add.
The wizard walks you through it with direct links: create a Google Cloud
project, enable the Search Console API, create the service account,
download its key file, and paste the file's contents into the wizard. The
key is stored encrypted in your own database.
Then you add the service account's email as a user in Search Console
(the wizard shows the exact clicks) and press **Verify connection** - it
asks Google right then and tells you if it worked. Google occasionally
takes a few minutes to catch up; you can continue and it re-checks on its
own.
This is the fiddliest step in the whole setup, and the only one that leaves
the app. If you want every click spelled out - including what to do when
your site isn't in Search Console yet and you need to add a DNS record to
prove you own it - [Google Search Console](/docs/search-console) is the
same walkthrough at full length.
## Step 3 - Pick a keyword data source
Two choices, switchable later in Settings:
- **DataForSEO (paid, recommended):** real Google search volumes and
difficulty scores - the same data most SEO tools resell. Pay as you go;
a typical site costs $2-5/month, and new accounts get $1 free.
- **Free mode ($0 forever):** Claude finds opportunities in your own
Search Console data and Google's autocomplete suggestions. If you go
free, the wizard offers one optional upgrade: a free SerpApi key
(250 searches/month, no credit card) that lets Claude look at the real
Google results page before writing, to judge whether a keyword is
winnable.
Whatever you pick, the wizard verifies the credentials against the real
service before saving them.
## Step 4 - Coding agent
One choice: **Claude Code**, **Codex**, or **Cursor**. All three do the
same job here - research, writing, pull requests - the difference is who
bills you. Claude Code runs on a Claude subscription you already pay for;
Codex runs on your own OpenAI API key, metered per run; Cursor runs on your
Cursor plan's API key. Pulse SEO never bills you for agent usage in
any case.
Everything after this adapts to your pick: the finish line's pastes come
ready for the agent you chose. You can still change your mind on the finish
screen, or any time later from the dashboard's top bar.
## Step 5 - Publish mode
Should anything go live without you?
- **Semi-automatic (recommended to start):** Claude researches and builds
on its own, but you approve ideas and click Merge on finished pages. A
few minutes of your attention a week.
- **Automatic:** everything runs itself; pages that pass their checks
publish without anyone touching them. You can watch and undo from the
dashboard.
There's a Semi/Auto toggle in the dashboard's top bar, so this is never a
final answer.
## Step 6 - Connect GitHub
Claude ships pages as GitHub pull requests, and this step gives Pulse SEO a
GitHub token so it can work with them. The wizard links you to a pre-filled
GitHub page, you press Generate, paste the token, and it's verified against
your repo before saving (encrypted, like everything else).
**Whether you can skip it depends on your install.** On a hosted install
(Vercel), the pipeline runs as GitHub Actions inside your own repo, so your
pages get built and the pull requests open either way - the token only adds
one-tap merging, and skipping just means you merge each PR on GitHub
yourself.
On a **Docker install using the bundled builder**, the token is how the
builder reaches your repo at all: it clones with it. Skip it and nothing
gets built - there are no pull requests waiting for you on GitHub, because
none were ever opened. The skip button is still there for the one case that
needs it (a Docker install on a public URL that lets GitHub-hosted workflows
do the building instead), but for everyone else on Docker, this step is
required.
One thing GitHub asks that the wizard can't answer for you: the token's
expiration. Whatever you pick, merging quietly stops working on that date,
and on a Docker install so does automatic building. Pick a window you'll
actually remember, or choose **No expiration** and treat the token like the
password it is. When it does expire, nothing breaks loudly - you just come
back to this step and paste a new one.
## Step 7 - The honest timeline
A month-by-month picture of what SEO actually looks like, so a quiet first
month reads as "on schedule" instead of "broken". Just read it.
## The finish line: two pastes
The last screen gives you two things to copy:
1. **A terminal command** that connects your coding agent to this project.
Run it inside your site's repo folder.
2. **A chat message** to paste into the agent itself (open the repo, type
`claude` or `codex`, paste). This one does the actual install.
Both come pre-adapted to the agent you picked on step 4, and the same
screen lets you switch agents if you've changed your mind.
From that second paste, your agent takes over: it writes the automation
workflow files into your repo, sets the repo secrets, opens one pull
request with all of it, personalizes the backlink playbook for your
product, and kicks off your first keyword research. You approve its steps
in the chat as it goes. It's safe to re-run if anything is interrupted.
Both pastes assume your coding agent and the GitHub CLI (`gh`) are already
on your computer. If they aren't - or if a command comes back
`command not found` - it's a one-time detour:
[Claude Code and gh](/docs/install-claude-code) in about five minutes, or
[Codex](/docs/install-codex) plus gh from
[cli.github.com](https://cli.github.com).
Docker installs get one more item on the same screen: **turning on
automatic builds**. One credential, minted for whichever agent you picked -
`claude setup-token` on your own computer for Claude Code, an API key
from [platform.openai.com/api-keys](https://platform.openai.com/api-keys)
for Codex, or an API key from
[cursor.com/dashboard/api](https://cursor.com/dashboard/api) for Cursor -
pasted into the field on this same screen (no terminal on the server
needed). The wizard's checklist flips green when the builder makes its
first check-in.
## Which key is which
Setup hands you four different secrets (the last one depends on which
agent you picked), and they look alike enough to mix up. You never have to
memorize or file any of them - the dashboard shows each one again wherever
it's needed - but when you're staring at a field wondering which string
goes in it:
| Key | Starts with | What it's for | Where it comes from |
| --- | --- | --- | --- |
| Agent key (MCP token) | a long random string | How your coding agent talks to this dashboard | Generated for you; already inside the connect command the wizard hands you. Also on Settings. |
| Cron key | a long hex string | Lets the scheduled jobs call your backend | Generated for you; the install sets it as a repo secret. You never paste it by hand. |
| GitHub token | `ghp_` | Lets the Approve button merge your pull requests | You create it on GitHub in step 6. |
| Claude Code token | `sk-ant-oat` | Docker only, if you picked Claude Code - lets the bundled builder run it for you | You create it by running `claude setup-token` on your own computer. |
| OpenAI API key | `sk-` | Docker only, if you picked Codex - lets the bundled builder run it for you | You create it at [platform.openai.com/api-keys](https://platform.openai.com/api-keys); the account needs credit on it. |
| Cursor API key | `crsr_` | Docker only, if you picked Cursor - lets the bundled builder run it for you | You create it at [cursor.com/dashboard/api](https://cursor.com/dashboard/api) (open that URL directly - the page is often missing from the dashboard's own menu). |
All of them are stored encrypted in your own database.
## Live progress, and what "stuck" actually looks like
The wizard tracks all of it live. When the pipeline PR is open, it shows
**"Your move: merge the pipeline PR"** with a direct link - merging that PR
is your one required click. The agent then verifies the full checklist
(workflows on the main branch, permissions, labels, secrets) and reports
back over MCP; the backend double-checks it independently. The dashboard
only unlocks once everything genuinely works. If the wizard says
it's still waiting, the agent isn't done yet - check its chat.
## When a step won't pass
Some of setup depends on things this page can't check for you: whether Google
has verified your property yet, or what your repo's workflow permissions are
set to. If a step keeps failing and
[Troubleshooting](/docs/troubleshooting) doesn't cover it, ask in the
[Discord](/discord). Say which step you're on and paste what the screen tells
you. Your progress is saved, so you can close the tab and pick up at the same
step once you have an answer.
---
# Install Claude Code
> Claude Code is the agent that does the actual work. Here is how to get it on your computer, from nothing, on any operating system.
Source: https://pulseseoapp.com/docs/install-claude-code
DispatchSEO doesn't write your content. Your Claude Code does. This
dashboard is its memory and its schedule, and the place you approve
things - the researching and writing happen in Claude Code, running on
your own Claude subscription.
So the setup wizard can't finish until Claude Code exists on your
computer. Never installed it? Start here. About five minutes, and none of
it needs you to know how to program.
## First, check your Claude plan
Claude Code is **not** part of the free Claude plan. There is no way around
this one, so check before you spend time on the rest of the page.
| Your plan | Claude Code |
|---|---|
| Free | Not included |
| Pro | Included |
| Max | Included |
| Team | Included |
| Enterprise | Included on current plans - older contracts have seat types that may not, so check with whoever manages your account |
On the free plan, Pro is the cheapest way in. Check or change your plan at
[claude.com/pricing](https://claude.com/pricing).
The terminal is a window where you type commands instead of clicking
buttons. It's already on your computer - nothing to install.
- **On a Mac:** press `Cmd` + `Space`, type `Terminal`, press `Enter`.
- **On Windows:** press the Start button, type `PowerShell`, and click
**Windows PowerShell**. Take the ordinary one, not "ISE", and you don't
need to run it as an administrator.
- **On Linux:** press `Ctrl` + `Alt` + `T`, or find Terminal in your
applications.
A window opens with some text and a blinking cursor. That's all it needs
to look like. Everything below is copy, paste, press `Enter`.
Copy the line for your system, paste it into the terminal, press `Enter`,
and wait. It prints a lot of text - that's normal.
**On a Mac or on Linux:**
```bash
curl -fsSL https://claude.ai/install.sh | bash
```
**On Windows,** in PowerShell:
```powershell
irm https://claude.ai/install.ps1 | iex
```
That's the whole install. It updates itself from here on, so this is a
one-time thing.
Prefer a package manager? `brew install --cask claude-code` on a Mac and
`winget install Anthropic.ClaudeCode` on Windows both work, but neither
auto-updates - upgrading is on you, with `brew upgrade claude-code`. Older
guides tell you to use `npm install -g`; skip that. It still works, but
Anthropic has deprecated it in favor of the command above.
Close the terminal window completely and open a new one. This matters -
the install changes a setting your old window has already read, so a
still-open window will claim nothing happened.
In the new window, type:
```bash
claude --version
```
A version number means you're done. If you get `command not found`
instead, the next section fixes it in one line.
Type `claude` and press `Enter`. The first run sends you to a browser to
sign in to your Claude account. After that, Claude Code is ready and you
can go back to the setup wizard.
## When the terminal says "command not found"
On a Mac or Linux you see `command not found: claude`; on Windows,
`'claude' is not recognized`. Both mean the same harmless thing: Claude
Code installed fine, your terminal just doesn't know where to look for it
yet.
The installer prints the exact fix at the end of its output, so scroll up
in that window if it's still open. Otherwise paste the line for your
shell:
```bash
# Mac (the default shell there is zsh)
echo 'export PATH="$HOME/.local/bin:$PATH"' >> ~/.zshrc && source ~/.zshrc
```
```bash
# Most Linux systems (bash)
echo 'export PATH="$HOME/.local/bin:$PATH"' >> ~/.bashrc && source ~/.bashrc
```
Then open a **new** terminal window and try `claude --version` again.
Two more errors look alarming and aren't:
- **A wall of HTML, or `syntax error near unexpected token`** - the
download served a web page instead of the install script. Usually a
network blip, occasionally a country Anthropic doesn't support yet. Try
again, or use the Homebrew or WinGet command above instead.
- **`'&&' is not a valid statement separator`** - you pasted a Mac command
into Windows PowerShell. Check which shell you're in: a PowerShell
prompt starts with `PS C:\`, plain Command Prompt starts with `C:\`.
Anthropic keeps a full list of install errors and their fixes at
[code.claude.com/docs/en/troubleshoot-install](https://code.claude.com/docs/en/troubleshoot-install).
## Get your setup token
Two places ask you to paste a token that starts with `sk-ant-oat`: the
hosted wizard's "Connect your coding agent" step (with Claude Code
picked), and the Docker install's automatic builds. The token is how a server runs Claude Code as you,
without you sitting there.
With Claude Code installed, run:
```bash
claude setup-token
```
It opens a browser, asks you to approve, then prints the token in the
terminal. Copy the whole thing and paste it where you were asked.
Three things to know:
- It's printed once and never saved to a file. Lose it and you run the
command again; a fresh one works the same.
- It lasts a year, then you generate a new one the same way.
- It needs a paid plan, same as the rest of this page.
## Install the GitHub CLI
Only self-hosted installs need this. The hosted version at pulseseoapp.com
does its GitHub work through the DispatchSEO GitHub App instead, so skip
this section if you're on the hosted plan.
`gh` is GitHub's own command-line tool. Your agent uses it to open pull
requests and set the secrets your automations need.
```bash
# Mac
brew install gh
```
```powershell
# Windows
winget install --id GitHub.cli --source winget
```
On Windows, open a brand-new terminal **window** afterwards; a new tab in
the same window won't find it.
On Linux, follow GitHub's install page for your distribution:
[github.com/cli/cli/blob/trunk/docs/install_linux.md](https://github.com/cli/cli/blob/trunk/docs/install_linux.md).
Then connect it to your GitHub account:
```bash
gh auth login
```
Answer the prompts: **GitHub.com**, then **HTTPS**, then let it
authenticate in your browser. The defaults are right at every step.
## Only copy these commands from official pages
Install commands are the one thing here worth being fussy about. Copy them
from this page, from
[code.claude.com](https://code.claude.com/docs/en/setup), or from the
[anthropics/claude-code](https://github.com/anthropics/claude-code)
repository - not from a search ad, and not from a site you have never
heard of. Fake install pages for popular developer tools are a real trick,
and an install command is exactly the thing you do not want to take from a
stranger.
Commands drift over time. If something here doesn't match Anthropic's own
setup page, trust theirs and
[tell us](https://github.com/NeoZi12/dispatchseo/discussions) so this page
gets fixed.
## Back to setup
Claude Code installed and signed in? Go back to the setup wizard - it
saved your place, so you'll land on the step you left. The
[wizard walkthrough](/docs/setup-wizard) covers every screen if you want
to read ahead.
---
# Use Codex instead
> DispatchSEO runs on OpenAI Codex end to end - connect over MCP, drive it by hand, and let it build overnight. Here is the setup, and the three places Codex differs from Claude Code.
Source: https://pulseseoapp.com/docs/install-codex
DispatchSEO is a backend with an MCP server on the front of it. Any coding
agent that speaks MCP can drive it, and Codex speaks MCP. So if Codex is
the agent you already use, you don't have to switch.
This page is the Codex version of
[Install Claude Code](/docs/install-claude-code). It is shorter, because
there is less to do.
## What you get
Read this bit before you set anything up. Half-answers here cost people
whole evenings.
| | Claude Code | Codex |
|---|---|---|
| Connect over MCP | Yes | **Yes** |
| Every tool the dashboard has | Yes - all of them | **Yes - all of them, verified** |
| Research keywords, fill the queue | Yes | **Yes** |
| Approve, reorder, edit the queue | Yes | **Yes** |
| Build a guide when you ask for one | Yes | **Yes** |
| Backlink prospecting, reports, trend scans | Yes | **Yes** |
| The unattended overnight builder | Yes | **Yes** |
Every `seo-*` workflow the pipeline installs carries every supported agent and asks
the backend which one to run when it wakes up. Switching agent on the
dashboard therefore takes effect on the next scheduled run: no repo edit,
no reinstall, nothing to remember. On a self-hosted install the in-stack
docker builder works the same way, per job.
## Three things that genuinely differ
The capability list is the same. These three are not, and flattening them
into "identical" would cost you money or an evening.
**You pay per run.** Claude Code runs on the Claude subscription you
already have, so an overnight build costs nothing extra. Codex runs on your
own OpenAI API key and OpenAI meters it per run - a nightly guide build is
a real, recurring charge on your OpenAI account. Nothing is billed by
DispatchSEO either way. If you turn on the unattended builders, set a
monthly spend limit at
[platform.openai.com/settings/organization/limits](https://platform.openai.com/settings/organization/limits)
first; that is the only thing standing between a runaway loop and your card.
**There is no turn budget.** The Claude Code runner caps each build at 150
turns, so a run that starts going in circles stops itself. Codex has no
`--max-turns` equivalent - OpenAI closed the request as not planned - so
the job's `timeout-minutes` is the only ceiling, and a stuck run burns
tokens right up to it. Watch your first few unattended runs and check what
they cost before you leave them alone.
**Connections are not folder-scoped.** Claude Code has a `--scope local`
that pins a connection to one repo folder. Codex has no equivalent -
`codex mcp add` always writes its global config. In practice this is fine,
because every project gets its own server name (`dispatchseo-`),
so two sites never collide. But both will be visible from every folder. If
you want strict per-repo isolation, set `CODEX_HOME` to a directory inside
the repo before running Codex there.
## Install Codex
You need Node.js 18 or newer. Then, in a terminal:
```bash
npm i -g @openai/codex
```
Check it landed:
```bash
codex --version
```
If that prints a version, you're done. If `npm` itself is missing, install
Node first from [nodejs.org](https://nodejs.org) - the LTS download,
default options.
Codex also has a Homebrew install on macOS (`brew install codex`) and its
own installers; OpenAI's
[CLI docs](https://developers.openai.com/codex/cli) cover every route.
## Sign in
Codex needs an OpenAI account. Run:
```bash
codex
```
and follow the sign-in it prompts for. A ChatGPT Plus, Pro, Business or
Enterprise plan includes Codex usage; an API key works too, billed per use.
Either is fine for the interactive side below - the connection doesn't care
which you used. The unattended builders are the exception: they run
headlessly and need a real API key, which is its own step further down.
## Tell DispatchSEO you're on Codex
Open your dashboard, go to **Settings → Coding agent**, and pick **Codex**.
The coding-agent pill in the top bar, next to the Semi/Auto switch, does
the same thing from any page: click it, then **Add agent** if Codex isn't
on the list yet.
That one switch is what the scheduled builders read. It does not affect
anything you do at a keyboard: whatever agent you have connected over MCP
drives the dashboard's whole tool set regardless of what this says. It only
decides who runs your scheduled builds.
If the new agent has no credential where your builders run, the dashboard
says so at the moment you switch rather than letting you find out from a
failed run the next morning. The next two sections are how you fix that.
## Connect it to your project
Still on **Settings**, find **Project key** and pick the **Codex** tab.
Copy the line and run it in a terminal:
```bash
codex mcp add dispatchseo-yoursite --url "https://pulseseoapp.com/api/mcp?key=YOUR-PROJECT-KEY"
```
Use the command from your own dashboard rather than the shape above - it
carries your project's key, and the key is what tells the server which site
you mean.
The same line works in PowerShell on Windows, unchanged. There is no header
to quote and nothing to chain, which is exactly why the key rides in the
URL.
Check it took:
```bash
codex mcp list
```
You should see `dispatchseo-yoursite`, enabled.
## Where OPENAI_API_KEY goes
The unattended builders run without you there, so they can't use the
browser sign-in - they need an API key. Create one at
[platform.openai.com/api-keys](https://platform.openai.com/api-keys). It
has to be on an account with credit; a key on an empty account passes every
shape check ever written and then fails on the first real build.
Where it goes depends on where your builds run:
- **GitHub Actions** (the usual setup): it is a repo secret named
`OPENAI_API_KEY` on your site's repo. The install command the dashboard
hands out collects and verifies it for you. To set it by hand:
`gh secret set OPENAI_API_KEY --repo you/your-site`.
- **Self-hosted docker**: paste it on Home's "Turn on automatic builds"
card - it is stored encrypted and the builder picks it up within a few
minutes. Setting `OPENAI_API_KEY` in your `.env` works too and overrides
the stored value, which is the path for scripted installs.
On a self-hosted install, one paste now covers both of those places. Since
2026-08-02, pasting on the dashboard also pushes the same value to every
connected repo's `OPENAI_API_KEY` Actions secret, in whichever order you do
things - paste first and connect GitHub later, or the other way round. That
closes a real bug: the paste used to reach only the docker builder, so the
GitHub-scheduled workflows read nothing and died within seconds
complaining about a missing token the owner had genuinely pasted. You only
need `gh secret set` by hand if the sync couldn't reach a repo, which needs
a GitHub token connected first - reconnect, then re-paste to retry.
Claude Code's equivalent is `CLAUDE_CODE_OAUTH_TOKEN`, in exactly the same
two places, with the same automatic sync. The names are different because
the credentials are different; nothing else about the wiring changes.
Both the install script and the dashboard verify a pasted key with a real
inference call before storing it, rather than a shape check. A stored key
that doesn't work reads as "automatic builds are set up" and only announces
itself as a failed run the next time a build is due.
## Things that surprise people
**The key sits in the URL.** That's what makes the connect a single paste that
works in every shell - Codex's only header-free alternative takes the *name* of
an environment variable, which then has to exist in every terminal you ever
launch Codex from. If you'd rather the key travelled as a header, that works
too; it just can't be done from `codex mcp add`, so edit
`~/.codex/config.toml` by hand.
**Codex asks before every tool call.** That's its normal behaviour and it's a
reasonable default, but it gets old fast when a research run makes twenty
calls. Adding `default_tools_approval_mode = "approve"` under the server's
entry stops the prompts for this server only - every other server, and every
shell command Codex wants to run, still asks. There's no flag for it on
`codex mcp add`; the line has to be added by hand.
Both edits land on the same entry, so here it is once, complete - the
header form of the key AND the approval line (if you keep the `?key=` URL
the connect command wrote, just drop the `http_headers` line and add the
approval one; **don't paste this as a second `[mcp_servers...]` block next
to an existing one** - TOML rejects a duplicate table and Codex won't
start):
```toml
[mcp_servers.dispatchseo-yoursite]
url = "https://pulseseoapp.com/api/mcp"
http_headers = { Authorization = "Bearer YOUR-PROJECT-KEY" }
default_tools_approval_mode = "approve"
```
Both key forms hit the same gate and see exactly the same data. Either way
the key ends up on your disk in Codex's config, the same as Claude Code
stores its own.
**Which model builds run on.** Scheduled Codex builds default to `gpt-5`.
Model access is per-account, not universal - some keys 404 on models they
can happily list - so if your builds die at model resolution, set the
`SEO_CODEX_MODEL` variable in your repo (Settings → Secrets and variables →
Actions → Variables, or `gh variable set SEO_CODEX_MODEL --repo you/site`)
to a model your account can serve. On a Docker install the same knob is
`CODEX_MODEL=` in the stack's `.env`. Your interactive Codex sessions are
unaffected either way - this only picks the model for unattended builds.
**Codex won't pick up a skill on its own.** Name the tool in your prompt.
This works:
> Call the dispatchseo-yoursite MCP tool get_instructions with workflow
> research and follow it exactly.
That pattern - naming the server and the workflow - is how you run any of
them. Swap `research` for `setup`, `build-guide`, `backlinks`, `report`,
`trend-scan`, or `geo-scan`. The
[agent commands](/docs/agent-commands) page lists what each one does.
Claude Code users have slash-command shorthands for these (`/seo-research`
and friends) because slash commands are a Claude Code file convention.
Codex has no equivalent, so the spelled-out prompt is the way - and it
works in Claude Code too.
## First run
Start with the setup workflow. It reads your repo, works out where your
content lives, and writes the site facts everything else depends on:
```bash
codex "Call the dispatchseo-yoursite MCP tool get_instructions with workflow setup and follow it exactly."
```
Codex will ask for approval before it runs commands or writes files. That's
its normal behaviour - approve the ones you're happy with.
Then research, to fill your queue:
> Call the dispatchseo-yoursite MCP tool get_instructions with workflow
> research and follow it exactly.
From there it's the ordinary loop: the dashboard shows the queue, you
approve what you like, and the overnight builder turns approved ideas into
pull requests while you sleep - or you ask Codex to build one now, if you'd
rather watch it happen.
## Something's wrong
**`codex: command not found`** - the install didn't finish, or your
terminal predates it. Close the terminal, open a new one, try again.
**`codex mcp` says it's not a command** - your Codex is too old for the MCP
subcommands. `npm i -g @openai/codex` again to update.
**Codex can't see the tools** - check `codex mcp list` shows the server as
enabled, then start a fresh Codex session. Connections load at startup, so
a session opened before you added the server can't see it.
**A tool call gets cancelled** (`user cancelled MCP tool call`) - Codex asked
permission and nothing answered. In an interactive session, approve it when it
asks. If you're running `codex exec` with nobody watching, there is nobody to
approve it - add the `default_tools_approval_mode = "approve"` line above.
Widening the sandbox does not help; this is an approval, not a permission.
**The key is rejected** - project keys change when a project is recreated.
Copy the current one from Settings → Project key and run the connect
command again; re-adding overwrites the old entry cleanly.
**The overnight build didn't run, or ran the wrong agent** - check
**Settings → Coding agent** actually says Codex. The workflows ask the
backend at run time, so the dashboard is the source of truth, not anything
in your repo. If it says Codex and the run still failed, the failure
message names the reason - a missing or revoked `OPENAI_API_KEY` and an
account out of credit are the two common ones, and both show on the
dashboard's Home banner.
---
# Use Cursor
> Connect Cursor to DispatchSEO over MCP in one paste - all 61 tools, in the editor and the CLI, plus the unattended overnight builder. Here is the setup, and the two things that surprise people.
Source: https://pulseseoapp.com/docs/install-cursor
DispatchSEO is a backend with an MCP server on the front of it. Any coding
agent that speaks MCP can drive it, and Cursor speaks MCP. If Cursor is the
editor you already live in, you don't have to switch to use this.
And not just the interactive half: **Cursor runs the scheduled overnight
builds too**, verified end to end on a real runner. The one thing to know up
front is that those builds need an API key (any plan mints one), because a
build server has no browser to log in with - the table and the notes below
are honest about what that costs.
## What you get
| | Claude Code | Codex | Cursor |
|---|---|---|---|
| Connect over MCP | Yes | Yes | **Yes** |
| Every tool the dashboard has | Yes | Yes | **Yes - all 61, verified** |
| Research keywords, fill the queue | Yes | Yes | **Yes** |
| Approve, reorder, edit the queue | Yes | Yes | **Yes** |
| Build a guide when you ask for one | Yes | Yes | **Yes** |
| Backlink prospecting, reports, trend scans | Yes | Yes | **Yes** |
| The unattended overnight builder | Yes | Yes | **Yes** via its API key |
The capability list is the same. One thing about that last row is worth
knowing before you plan around it: the overnight builds run on a server with
no browser, so they can't use the login you'll do in step 1. They need a
Cursor API key - any plan can mint one at
[cursor.com/dashboard/api](https://cursor.com/dashboard/api) (open that URL
directly; the page is often missing from the dashboard's own menu).
Builds draw on your Cursor plan's included usage, and the free plan's pool is
small - a single setup run can exhaust it - so a nightly schedule
realistically wants a paid plan for capacity. Two more free-plan facts,
both measured: the free plan can only run Cursor's `auto` model (setting
the `SEO_CURSOR_MODEL` repo variable to a named model fails the run with
"Named models unavailable"), and when the pool runs dry the builders
report a deferral - the build stays due and retries once usage resets.
If you'd rather not pay for that, pick Claude Code or Codex as the builder on
**Settings → Coding agent** and keep using Cursor all day - the builder
setting only decides who runs the scheduled jobs, not who you work with.
## Step 1: install Cursor
If you already use the Cursor editor, you have what you need for the editor
half and can skip to step 2.
For the command line, run this:
```bash
curl https://cursor.com/install -fsS | bash
```
That installs `cursor-agent` into `~/.local/bin`. If your shell can't find it
afterwards, that directory isn't on your `PATH` - add it:
```bash
echo 'export PATH="$HOME/.local/bin:$PATH"' >> ~/.zshrc && source ~/.zshrc
```
Check it worked:
```bash
cursor-agent --version
```
## Step 2: connect your project
Open a terminal **in your site's repo folder** - the same folder you'd open in
Cursor - and paste the command from your dashboard: **Settings → Project key**,
Cursor tab. It already has your project's key filled in.
It looks like this:
```bash
mkdir -p .cursor && node -e '...' && cursor-agent mcp enable dispatchseo-yoursite
```
Two things it does, both on purpose:
- **It writes `.cursor/mcp.json` in this folder**, merging into that file
rather than replacing it. Any MCP servers you already had are left alone.
- **It approves the server.** Cursor won't load an MCP server it hasn't been
told to trust, so writing the config isn't enough on its own. This is the
step people miss when they wire it up by hand.
## Step 3: check it actually connected
```bash
cursor-agent mcp list
```
You want to see exactly this:
```
dispatchseo-yoursite: ready
```
`ready` means Cursor reached the server and authenticated. Two other answers
you might get:
- `not loaded (needs approval)` - the config is there but the approval isn't.
Run `cursor-agent mcp enable dispatchseo-yoursite`.
- `Error: Connection failed` - the server was reached but rejected the key.
Copy the command from your dashboard again; the key is probably truncated.
To see the tools themselves:
```bash
cursor-agent mcp list-tools dispatchseo-yoursite
```
That prints all 61, with their arguments.
## Step 4: use it
There are no slash commands - those are a Claude Code file convention. With
Cursor you name what you want in a normal prompt:
> Use the dispatchseo tools. Call get_instructions with workflow "research",
> then follow it.
Or just ask for something and let it find the tool:
> Using dispatchseo, show me my current keyword queue and what's ranking.
The same works in the Cursor editor's chat, since the editor and the CLI read
the same `.cursor/mcp.json`.
## Two things that surprise people
**A written config is not a connected server.** Cursor keeps an approval list,
and a server it hasn't approved shows as `not loaded` and hands the agent no
tools at all. The connect command above handles this. If you ever edit
`.cursor/mcp.json` by hand, re-run `cursor-agent mcp enable ` after -
changing the config invalidates the old approval.
**The connection belongs to the folder, not to you.** `.cursor/mcp.json` sits
in the repo, so each site you manage gets its own connection and its own key,
and they can't shadow each other. Open a different project's folder and you get
that project's tools. This is what you want, and it's worth knowing before you
wonder why the tools vanished in an unrelated repo.
## Something's wrong
**`command not found: cursor-agent`** - `~/.local/bin` isn't on your `PATH`.
See the export line in step 1.
**The tools don't show up in the editor** - Cursor reads the config when it
opens the folder. Close the window and reopen the repo.
**`Connection failed`** - the key is wrong or incomplete. Re-copy the command
from **Settings → Project key**; the most common cause is a key that got cut
short on the way over.
**Everything connects, but nothing gets built overnight** - check two things.
Cursor has to be selected under **Settings → Coding agent**, and your site's
repo needs a `CURSOR_API_KEY` secret (the login on your laptop doesn't reach a
build server). The setup command collects and verifies that key for you.
## Turning on the overnight builds
Two things, in this order:
1. **Settings → Coding agent → Cursor.** That's one column write; it takes
effect on the next scheduled run with no repo edit and no reinstall.
2. **A `CURSOR_API_KEY` secret on your site's repo.** Create the key at
[cursor.com/dashboard/api](https://cursor.com/dashboard/api) - open the
URL directly - then either re-run the setup command
from your dashboard - it collects the key and checks it with Cursor before
saving - or set it yourself:
```bash
printf '%s' "" | tr -d '[:space:]' | gh secret set CURSOR_API_KEY --repo /
```
The `tr -d` is not fussiness: terminals paste long keys with a real newline
inside them, and GitHub will happily store the broken version.
One honest note on how new this is. Cursor is the newest of the three builders
here, and while the whole chain has been run against the real server, it has
had less time on a schedule than Claude Code and Codex. If a run fails you'll
hear about it - a failure that isn't recognised as a temporary limit is
reported loudly rather than quietly retried - but if you'd rather your night
shift be the most-travelled path, Claude Code is it.
---
# Google Search Console
> Connect free rankings and traffic data with a Google service account.
Source: https://pulseseoapp.com/docs/search-console
Search Console is DispatchSEO's free data backbone: real impressions,
clicks, and positions for your site, snapshotted hourly. Connecting it
takes a service account - a Google robot identity that can read your
Search Console data without your password.
The setup wizard walks you through all of this with a check button at the
end - this page is the same walkthrough in document form, every click
spelled out. It's a one-time ritual: the same service account works for
every site you ever add.
## Create the service account
1. Open [console.cloud.google.com](https://console.cloud.google.com) and
sign in with the Google account that can see your site in Search
Console.
2. **Create a project:** click the project picker in the top bar → **New
project** → name it `dispatchseo` → **Create**. (Already have any
project? Reusing it is fine.)
3. **Turn on the API:** open
[the Search Console API page](https://console.cloud.google.com/apis/library/searchconsole.googleapis.com)
and click **Enable**.
4. **Create the account:** open
[Service Accounts](https://console.cloud.google.com/iam-admin/serviceaccounts),
click **Create service account**, name it `dispatchseo`, click
**Create and continue**, skip the roles screen (**Continue**), click
**Done**. It needs no permissions - it just needs to exist.
5. **Download its key:** click the account you just made → **Keys** tab →
**Add key** → **Create new key** → pick **JSON** → **Create**. A
`.json` file downloads. That file is a password for your search data -
keep it out of screenshots, chats, and git.
## Grant it access to your site
1. On the service account's page, copy its **email** - it ends in
`.iam.gserviceaccount.com`.
2. Open [Search Console](https://search.google.com/search-console), pick
your site, then **Settings → Users and permissions → Add user**.
Site not listed? It isn't in Search Console yet - add it first: click
**Add property**, choose the **Domain** type, enter your domain, and add
the DNS record Google shows you wherever your domain is registered
(Namecheap, Cloudflare, GoDaddy, ...). Verification is usually instant;
then continue with the steps above.
3. Paste the email, set Permission to **Full**, click **Add**.
## Give it to DispatchSEO
Open the downloaded `.json` file in any text editor, select **all** of
it, and paste it where the setup wizard (or the dashboard's **Connect
Search Console** card) asks. Press **Verify connection** - it asks Google
right then and tells you whether it worked. If Google says no at first,
wait a few minutes and verify again; permissions can lag.
Env-var installs can set it directly instead:
```bash
GSC_SERVICE_ACCOUNT_JSON=... # the whole JSON, single line
GSC_SITE_URL=sc-domain:example.com # or https://example.com/ for URL-prefix properties
```
Within an hour the first snapshot lands and the dashboard's Search traffic
page starts filling in. Historical data backfills from what Google exposes
(up to ~16 months).
## The data tiers
Search Console is the free floor. The tiers stack - start free, add keys
when you want more signal:
| Tier | Price | What you get |
| --- | --- | --- |
| Search Console only | $0 | Rankings from GSC, keyword ideas from Autocomplete plus your own impression data |
| + SerpApi free key | $0 | Live SERP checks, real positions weekly (250 free searches/month) |
| + DataForSEO | pay per call | Search volume, keyword difficulty, domain rating |
Free mode finds keywords you can win. Paid mode also knows which ones are
worth winning.
---
# Keyword data sources
> The three stacking tiers for keyword data - what each costs, what it unlocks, and how to switch later.
Source: https://pulseseoapp.com/docs/keyword-data
DispatchSEO never has just one keyword data source. It has three, and they
stack: everyone starts on the free floor, and you add a key only when you
want a sharper signal than the free tier gives you.
Free mode finds keywords you can win. Paid mode also knows which ones are
worth winning. Neither is wrong - it depends whether you'd rather spend time
or money finding out.
## The three tiers
| Tier | Costs | You get |
| --- | --- | --- |
| **Search Console only** (default) | $0 | Rankings from GSC, keyword ideas from Google Autocomplete plus your own impression data |
| **+ SerpApi key** | $0 (250 searches/month) | Live SERP checks: real positions weekly, page-1 recon before writing |
| **+ DataForSEO** | pay per call, prepaid | Search volume, keyword difficulty, domain rating |
### Search Console only
This is where every project starts, and it's a real, working mode - not a
crippled trial. Your agent mines keywords two ways: Google Autocomplete
(free, no key, works everywhere) and your own Search Console impressions
(queries Google already shows your pages for, which is the single best
signal that a keyword is reachable).
What you don't get here is a number. No search volume, no difficulty score -
your agent judges a keyword by what it can see in the actual results, not by
a database estimate. That's a real limitation for prioritizing between fifty
candidates, but it's not a limitation for finding good ones.
Nothing to set up. This is simply what happens with no keys connected. See
[Google Search Console](/docs/search-console) for how the GSC connection
itself works.
### + a free SerpApi key
One optional upgrade while staying at $0: a [SerpApi](https://serpapi.com)
key gives your agent a live look at the actual Google results page before it
writes anything. If page 1 is thin forum posts and old listicles, the
keyword is winnable. If it's five major brands and a review site, skip it.
That's a judgment call no autocomplete list can make for you.
The free tier is 250 searches a month, no credit card. It also unlocks real
weekly rank tracking through a live SERP check, instead of relying on Search
Console's impression-weighted average position (which is real data, but
lagged and not a true rank).
Add the key any time in Settings, or during the wizard's keyword-data step -
see
[Step 3 of the setup wizard](/docs/setup-wizard#step-3-pick-a-keyword-data-source).
### + DataForSEO
The paid tier, and the only one with real numbers: monthly search volume,
keyword difficulty (KD), CPC, and domain rating for your own site. This is
what lets your agent rank fifty keyword candidates by how much traffic
they're actually worth and how hard they'll actually be to win, instead of
reasoning from the SERP alone.
A typical site tracking around 30 keywords spends about $2-5/month. New
DataForSEO accounts start with free trial credit, no card required.
Free-tier DIY means exactly that: every project brings its own DataForSEO
account, and every call bills that project's own balance -
`credsForProject()` in `src/lib/dataforseo.ts` is the one place this is
resolved. Only the **default project** (the instance's first site) falls
back to the `DATAFORSEO_LOGIN` / `DATAFORSEO_PASSWORD` environment
variables, if they're set. Every other project needs its own connected
account or its own env fallback doesn't apply. A project with no DataForSEO
connected gets `null` creds and every paid feature (rank checks, keyword
ideas, domain rating) skips gracefully - never an error, never a broken
cron. You'll see this reflected honestly on the dashboard: paid numbers
simply aren't there until a key is connected.
#### Getting the API password (the part that trips people up)
DataForSEO's login is your account email, but the password is **not** your
dashboard login password - it's a separate API password DataForSEO
generates for you.
Sign up at [app.dataforseo.com](https://app.dataforseo.com). New accounts
start with free trial credit, no card needed.
Go to [app.dataforseo.com/api-access](https://app.dataforseo.com/api-access)
and copy the password shown there. This is generated specifically for API
calls - it is not the password you use to log into the DataForSEO dashboard,
and using the wrong one is the single most common reason a connection fails
its first check.
DataForSEO hides it about 24 hours after signup. Click **Send by e-mail** on
the same page and it lands in your inbox.
Login (your account email) and API password go into the wizard's keyword-data
step, or Settings later. Both are checked live against DataForSEO before
saving, so a green check means tonight's rank check will actually work.
Because the API password isn't your dashboard login, it can't be used to
sign into or take over your DataForSEO account - it only makes API calls
against your own prepaid balance, and you can regenerate it any time to cut
DispatchSEO off.
## Watching what it costs
Once DataForSEO is connected, the `get_dataforseo_usage` MCP tool (and the
matching dashboard view) answers three questions:
- **Who's billed** - your own connected account, the platform's bundled plan
(cloud only), or nobody (nothing connected).
- **This month's spend**, when billed to the platform - month-to-date
against the plan's monthly budget.
- **Today's `check_serp` count**, against its daily cap (see below).
On a self-hosted project running its own DataForSEO account, usage isn't
metered here at all - it's your account, your balance, check it directly at
app.dataforseo.com.
If a cloud project's projected month-end spend starts closing in on its
plan's budget, a pacing governor thins the rank-check cadence automatically
(normal, then slowed, then weekly-only) so tracking degrades gracefully
instead of stopping mid-month the moment the budget is hit.
## The cloud version: bundled, capped, not metered
On the hosted product at pulseseoapp.com, DataForSEO isn't something you
connect - it's bundled into the subscription (`DATAFORSEO_PLATFORM_LOGIN` /
`DATAFORSEO_PLATFORM_PASSWORD` server-side, never written into your repo,
never returned to a client). You get real search volume and difficulty
without ever touching an API password.
The trade-off is a rate cap, not a spend cap: `check_serp` (the live,
interactive "show me page 1 right now" tool) is capped at **30 calls a day**
per project on the shared plan. That's deliberate - a live SERP lookup is
cheap and meant for interactive research, and the real spend guard is the
monthly budget above, not this cap. Anything worth tracking on an ongoing
basis goes through `track_keywords` instead, which the daily rank cron
checks for you at no extra cost against the cap.
Connecting your own DataForSEO account on a cloud project is also possible,
and once connected it's billed and metered exactly like self-host - your own
account, your own balance, no platform cap.
## Changing your source later
The keyword source is a per-project setting, switchable any time in
Settings - it isn't a one-way decision made during onboarding. See
[Step 3 of the setup wizard](/docs/setup-wizard#step-3-pick-a-keyword-data-source)
for what the wizard itself asks, and the wizard always verifies new
credentials against the real service before saving them.
## Next
The free floor every tier builds on.
Where you pick a tier for the first time.
What using DispatchSEO looks like once it's running.
---
# Publishing and GitHub
> How an approved idea actually becomes a live page - the pull request, the checks, and who presses merge.
Source: https://pulseseoapp.com/docs/publishing
DispatchSEO never touches your live site directly. Everything it ships goes
through GitHub, as a pull request, checked before it merges. This page covers
the mechanics: what opens the PR, what decides whether it merges itself, and
what happens after.
## The flow
1. You (or auto mode) approve a suggestion in the queue.
2. The builder picks up the oldest approved idea and opens a **pull request**
against your site's own repo, labeled `seo`.
3. Automated checks run against it - your repo's own build, a preview
deploy, a code review pass, and for tools a live functional test (below).
4. You review it, or it merges itself. Either way, once it merges, the page
goes live on your site's next deploy.
Never a direct push to your main branch. The label and the pull request are
the review surface - even in fully automatic mode, "merged a green PR" is a
different, safer claim than "committed straight to main," because it means
every gate below actually ran and passed before anything shipped.
## Publish modes
Whether that merge needs you is a per-project setting, not a fixed behavior:
- **Semi-automatic** (recommended to start): your agent researches and
builds on its own, but a PR only ships once you press **Merge** on the
dashboard.
- **Automatic**: PRs whose checks all pass merge themselves. You watch the
activity feed and can still undo from the dashboard.
Change it any time on [Automations and modes](/docs/automations), or from
the dashboard's Semi/Auto toggle in the top bar - see
[Step 5 of the setup wizard](/docs/setup-wizard#step-5-publish-mode) for what
it means when you first pick it. It's never a final answer.
## Auto-merge mechanics
The actual merging - even in automatic mode - is done by
`seo-auto-merge.yml`, a workflow the pipeline installs into your repo. It
runs on an hourly schedule plus whenever a check reports, so a PR usually
merges within a minute of its last check finishing, not on the hour.
Each pass, for every open PR labeled `seo`:
- It checks whether the project's `auto_merge` automation flag is actually
on right now (read live from the dashboard) - `off` means every eligible
PR just waits, checks and all.
- It classifies the PR by shape: a **guide** PR must touch only files under
your repo's declared publish directories (`.dispatchseo/publish-paths`, or
the reference-stack defaults); a **tool** PR must carry the
`tool-validated` label from the validation workflow below. Anything else -
a structural change, an unvalidated tool - waits for you no matter what
the checks say.
- It reads every check on the PR (your build, the preview deploy, code
review) into one verdict: any check still pending waits for the next pass,
any failing check leaves the PR for you, and **zero checks reported is
never treated as green** - no gate is the same as an unsafe gate.
- Only when every check has actually passed does it squash-merge and delete
the branch.
## Tool validation
Guide PRs merge on the checks above. Tool PRs get one more gate first, run by
`seo-tool-validate.yml`: a real production build, started for real, opened
in a headless browser, with every interactive element on the new tool's page
actually clicked and checked - inputs filled, outputs verified, edge cases
(empty input, garbage input) confirmed not to break it, zero console errors.
Pass, and the PR gets a `tool-validated` label; fail, and it gets
`tool-validation-failed` plus a comment naming exactly what broke.
That label is what `seo-auto-merge.yml` looks for before it will touch a
tool PR at all - a widget that merely builds is not the same claim as a
widget that was proven to work.
The validate job checks out and *runs* the tool PR's own code - code an LLM
wrote, in a PR that could in principle contain anything. So it deliberately
carries no secrets at all, not even the project's own MCP key: it can only
read and label, never merge or report outcomes. A separate `merge` job, on a
fresh runner that never checks out the PR's code, does the actual
squash-merge and phones the result home to the dashboard. Untrusted code and
write credentials never share a job.
## The one-tap Merge button
On the dashboard (and over MCP via `merge_pr`), an open, green PR gets a
one-click **Merge** button - useful in semi-automatic mode, where you're
approving the merge yourself instead of waiting on the workflow above.
It needs a GitHub token with write access to your repo (`GH_MERGE_TOKEN` on
a classic install, or the pasted token from the wizard's GitHub step on
Docker). Without one, the button degrades to a plain link to the PR on
GitHub - you can still merge it there, DispatchSEO just can't do it for you.
On a Docker install using the bundled builder, this same token is also how
the builder reaches your repo at all to open PRs in the first place - see
[Step 6 of the setup wizard](/docs/setup-wizard#step-6-connect-github) for
what happens if it's skipped there.
## After a PR merges
Three things happen automatically, no button to press:
1. **The page is logged** (`log_page`) - it enters the dashboard's Guides
list and the internal-linking picture your agent reads before writing the
next one.
2. **Indexing is requested** - the page joins the "Get it on Google" queue
for a Search Console indexing request, and DispatchSEO starts checking
whether Google actually picked it up.
3. **Its keyword starts being tracked** - it joins the daily rank-check
rotation, so its position shows up on Rankings without you doing anything
further.
A freshly logged page shows as "awaiting publish" until its URL actually
serves HTTP 200 - the merge and the live deploy aren't the same moment, and
DispatchSEO waits for the real one before calling a page live.
## Cloud vs self-host: connecting GitHub
The mechanics above are identical either way; only how DispatchSEO
authenticates to your repo differs:
- **Cloud**: one-click install of the DispatchSEO GitHub App on your repo.
The platform commits the pipeline and manages PRs through the App - no
tokens to create or paste.
- **Self-host**: you generate a personal access token once
(`GH_MERGE_TOKEN`, or pasted through the wizard) and DispatchSEO uses it
for merging, and on a Docker install, for the builder's own clone-and-push
access.
See [Cloud or self-hosted](/docs/choosing-how-to-run-it) for the full
comparison, and
[Step 6 of the setup wizard](/docs/setup-wizard#step-6-connect-github) for
exactly what that step asks for on a self-hosted install.
## GitHub Actions costs
The 11 workflows above run as GitHub Actions in your own repo, on your own
GitHub account - not on DispatchSEO's infrastructure, and we never touch or
mark up what GitHub charges for them. Each connected site burns roughly 800
Actions minutes a month keeping research, builds, and validation running.
GitHub's free tier includes 2,000 Actions minutes a month, so your first two
sites are comfortably covered at $0. From a third site you're past that
allowance - [GitHub Pro](https://github.com/settings/billing) is $4/month
and is the simplest fix, or you can let GitHub bill the overage directly.
Rough numbers, since actual minutes depend on how long your builds run:
| Sites | Roughly |
| --- | --- |
| 1 | $0 |
| 2 | $0 |
| 3 | ~$4 (GitHub Pro covers it) |
| 4 | ~$5 |
| 5 | ~$10 |
| 6 | ~$15 |
| 7 | ~$20 |
| 8 | ~$24 |
| 9 | ~$29 |
| 10 | ~$34 |
Treat this as a ballpark, not a bill - repo size and build time move it in
either direction.
A personal account has no Actions budget by default. Once you're past the
free minutes, GitHub does not send you a bill - it silently pauses your
workflows. Fixing it takes two things, and the first is easy to miss: a
payment method on file, *then* a budget, because a budget does nothing
without a card behind it.
At [github.com/settings/billing](https://github.com/settings/billing), add
your payment method first - GitHub refuses to create a budget without one.
Then open **Budgets and alerts** -> **New budget**. Under **Budget type**
choose **Product-level budget** (it preselects the AI credits one), continue
to **Next: Configure budget**, and pick **Actions** as the product before
setting your amount. (GitHub used to call this a "spending limit"; the phrase
still turns up in some of its error messages, but the control is now a
budget.) Set yours before you need it, not after a build goes mysteriously
quiet.
One way to sidestep all of this: public repositories get unlimited free
GitHub Actions minutes. If your site's repo can be public, GitHub Actions
costs nothing at all, regardless of how many sites you connect.
## Turning it off for a site
Settings has a **Disconnect repo** button in the danger zone. It switches off the
`seo-*` workflows in your repo, deletes them along with the `.dispatchseo` folder
and the `SEO_MCP_API_KEY` secret, and clears the connection. Every schedule stops,
so it stops using your GitHub Actions minutes.
What it never touches: the guides and tools that already shipped, any templates
the setup agent added to your site, and everything this dashboard has tracked -
keywords, rankings, history. Reconnecting the repo later re-installs the pipeline.
The button is there for your first site too. That one can't be deleted, because
the rest of your setup is anchored to it, so disconnecting is how you stop it.
If GitHub can't be reached - a rotated token, an uninstalled App - the repo stays
connected on purpose and the error says why. Clearing the connection while the
workflows were still live would leave them running against a project that no
longer claims them, with nothing left to retry from.
Claude Code can do the same thing with the `disconnect_repo` tool.
## Publishing pace
However fast ideas get approved, guides ship at a flat rate: **at most one
guide per UTC calendar day**, permanently - not "while the site is new," a
fixed ceiling. It's the single biggest protection against DispatchSEO ever
reading as scaled, templated content: a queue of ten approved guides still
surfaces as one PR a day, every day, whether the project is one week old or
two years old. Tools aren't rate-limited the same way - a validated tool PR
can ship the moment it passes.
## Next
Every toggle, including auto_merge, explained.
What approving and merging looks like week to week.
When the builder and auto-merge actually run.
---
# The Content API
> Publish without giving Pulse any access to your site - articles land in your Content API and your site pulls them at build time.
Source: https://pulseseoapp.com/docs/content-api
The third publishing route. On GitHub, Pulse commits into your repo; on
WordPress, it posts with a stored credential. On the **Content API** it
touches nothing you own: finished articles land in your own read-only
API on Pulse, and your site fetches them - at build time, on a schedule,
or per request. Pulse never holds write access to your repo, your CMS,
or your hosting.
## Turning it on
Settings → **Content API** → *Switch this site to the Content API*. That
mints your **delivery key** (`pcak_...`), shown on the same card - copy it
into your site's build environment (for example a `PULSE_CONTENT_KEY`
env var). Your agent can also run the `set_content_api` MCP tool, but the
key itself only ever appears on the dashboard.
Two optional settings on the card:
- **Blog path** - where your site serves the articles (default `/blog`).
Canonical URLs in each article's structured data use it, and after each
publish we check `https://your-domain{path}/{slug}` until the article
appears there.
- **Rebuild hook** - a Vercel or Netlify deploy hook we `POST` after each
publish, so a fully static site rebuilds without polling.
Switching is not a one-way door: the same card switches you back to pull
requests or WordPress at any time.
## Authentication
Every endpoint takes the delivery key as a bearer header:
```bash
curl -H "Authorization: Bearer pcak_..." \
https://pulseseoapp.com/api/content/v1/posts
```
The key is read-only and scoped to one project - it can list and read
that site's published articles and nothing else. Keep it server-side:
in a build step or a server route, never in client-side JavaScript
(a browser bundle is public, and the header would ship with it). Rotate
it from the Settings card; the old key stops working immediately.
## Endpoints
All four live under `/api/content/v1`. Responses are CDN-cached for five
minutes, so a publish reaches your site within minutes and build-time
fetch bursts are cheap.
### `GET /posts`
The article index, newest first - summaries only, no bodies.
| Query param | Meaning |
| --- | --- |
| `limit` | 1-100, default 50 |
| `before` | pagination cursor: the `next_before` from the previous page |
```json
{
"posts": [
{
"slug": "how-to-warm-up-a-cold-domain",
"title": "How to warm up a cold email domain",
"description": "A 155-character meta description.",
"cover_url": "https://pulseseoapp.com/api/cover/....",
"reading_minutes": 7,
"published_at": "2026-09-21T09:00:00.000Z",
"updated_at": "2026-09-21T09:00:00.000Z"
}
],
"next_before": null
}
```
`next_before: null` means that was the last page.
### `GET /posts/{slug}`
One article, everything a page needs:
| Field | What it is |
| --- | --- |
| `html` | The sanitized, internally-linked article body. Render it as-is. |
| `markdown` | The same article as markdown, if you run your own renderer. |
| `jsonld` | Structured data (Article + FAQ schema) as an object - emit it in a `